
 Let’s face it, this is the time of the year when we are all getting tired and supplies are running low. OK, so that’s pretty much true no matter when you are reading this. Over the years I’ve discovered lots of classroom hacks to make it easier to produce and use materials in our classrooms. So I thought I would share some of them with you. Some you may know, others might be new. But, really, if we can save one teacher from having to redo all the Velcro in her room because it doesn’t match…that pretty much makes it worth it!
Disclosure: This post contains affiliate links. If you purchase through these links, I make a small commission but the price for you is the same. I only include links for materials I have used or would use. Also, if you are interested in any of the products in the pictures, just click the picture and it will take you to that product in my store.
10 Special Education Hacks
1. A Dot of Glue Will Do (on the back of your visuals before laminating)
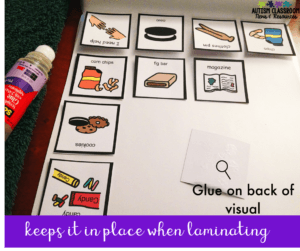 Don’t you hate it when you put something through the laminate and pieces overlap while it’s laminating? Then you have to decide whether to cut them apart and have the laminate peel or do them over. Argh! No more…just a bit of glue on the back secures them.
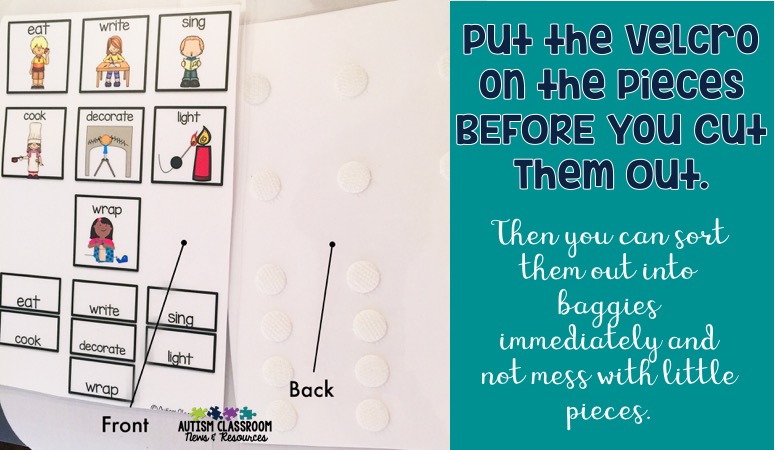
2. Put the Velcro on Before Cutting
This means you don’t have to find all the pieces and put Velcro on them. Instead you can cut them and sort them directly into the baggies. As an added benefit, you could also quickly label them with a code of the material they match. That helps if you are laminating multiple products.
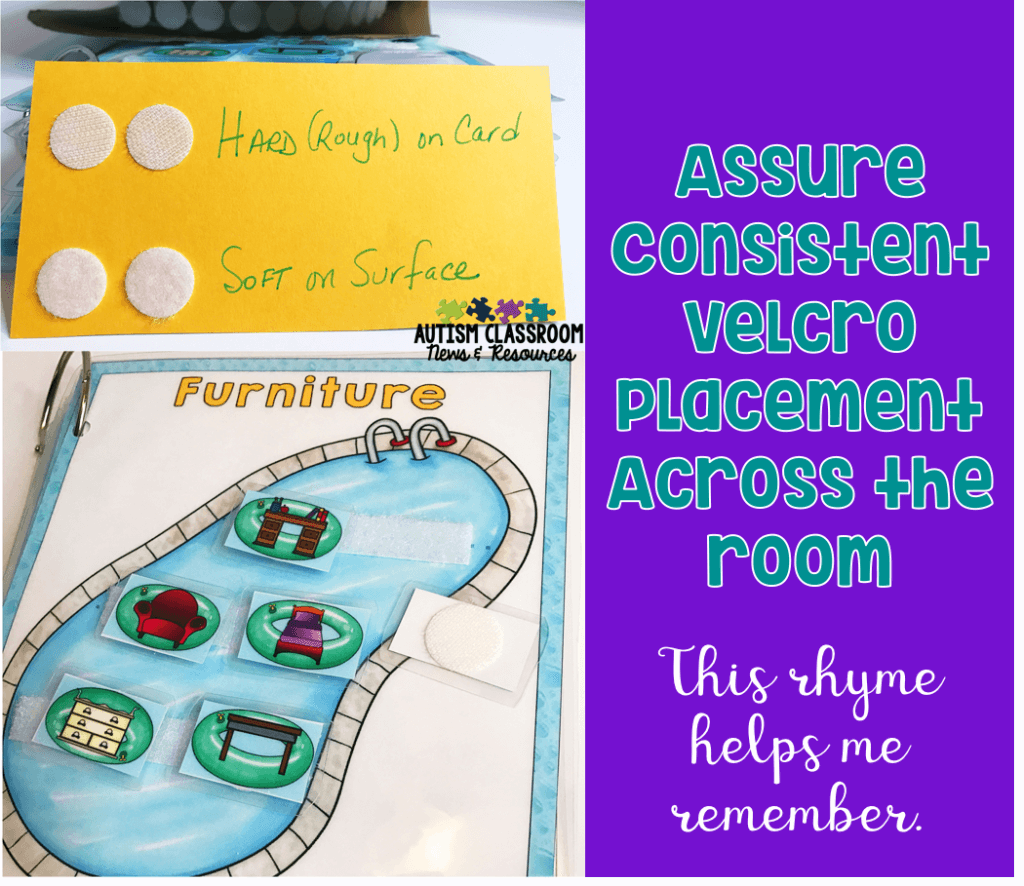
3. Use Consistent Velcro Across Your Room
Most of you probably know this one. I use hard on the pieces or cards and the soft side on surfaces. We did this because we liked to put visuals on cubbies and felt boards, so having the rough side on the pieces allowed that. Put up a sign so everyone in the room knows the system (whichever system you choose).
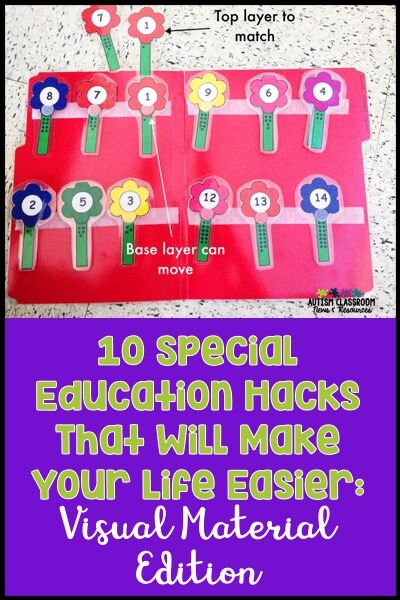
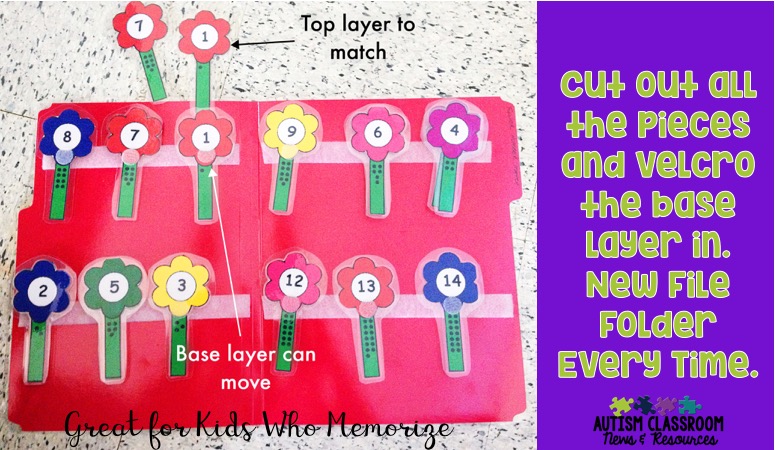
4. Make File Folders with Movable Pieces
Do you have students who memorize where things go? I certainly have! So, to avoid that, set it up so the file folder won’t always be the same. To do that, instead of pasting a whole set page into the folder, cut the pieces up. It does mean a bit more time, but it makes a file folder that will last that much longer. Put s0ft Velcro on the folder and rough/hard on the pieces. Then you can move the bottom pieces around so the student can’t learn the order.
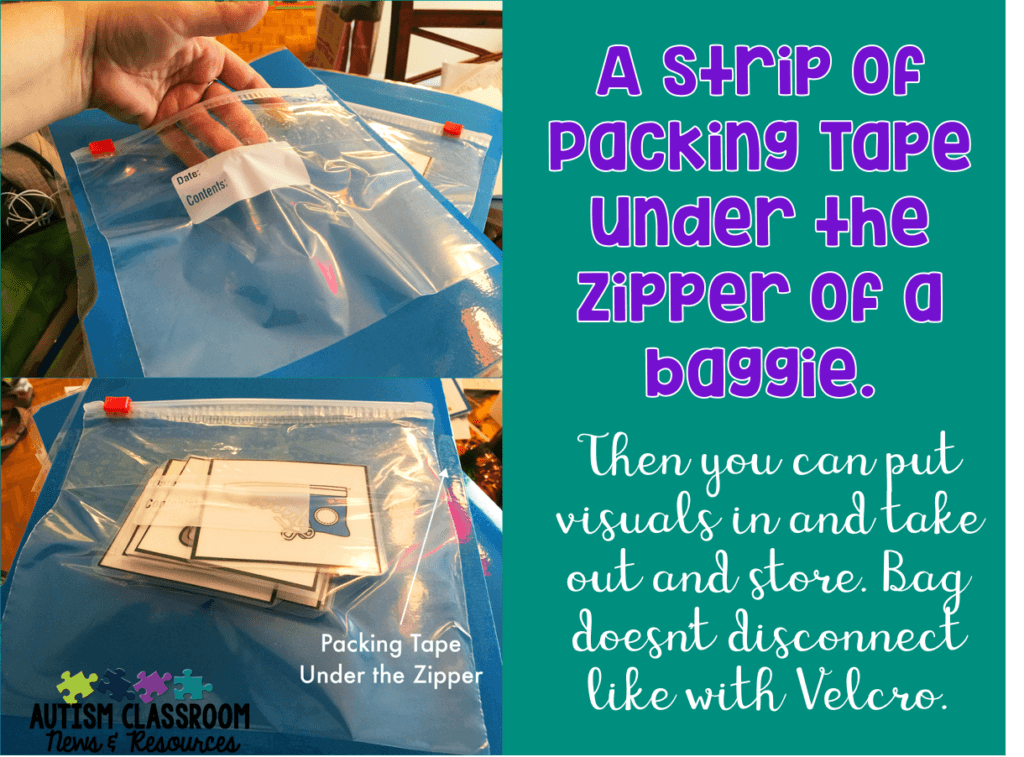
5. Fasten a Baggie for Pieces on File Folders
Setting up the file folders, it’s always hard to decide what to do with the pieces. Attach a bag or envelope with Velcro and it comes apart. Instead, use clear packing tape and put a strip directly under the zipper. Make it just longer than the baggie is wide and leave a little slack to get your hand inside. It will stick for a long time no matter how you store the file folder.
6. Magnet Interactive Books to Cookie Sheets
Ever tried to hold out an interactive book for students to manipulate the visuals, especially in a group? No matter what type of laminate we use, they are still flimsy. You could put Velcro on the back of the book and secure it to foam board or a felt board. Or you can use a cookie sheet with magnet tape. I like this option best because there is no Velcro to stick to other stuff when you take it apart.

7. Use Box Tops to Hold Visuals
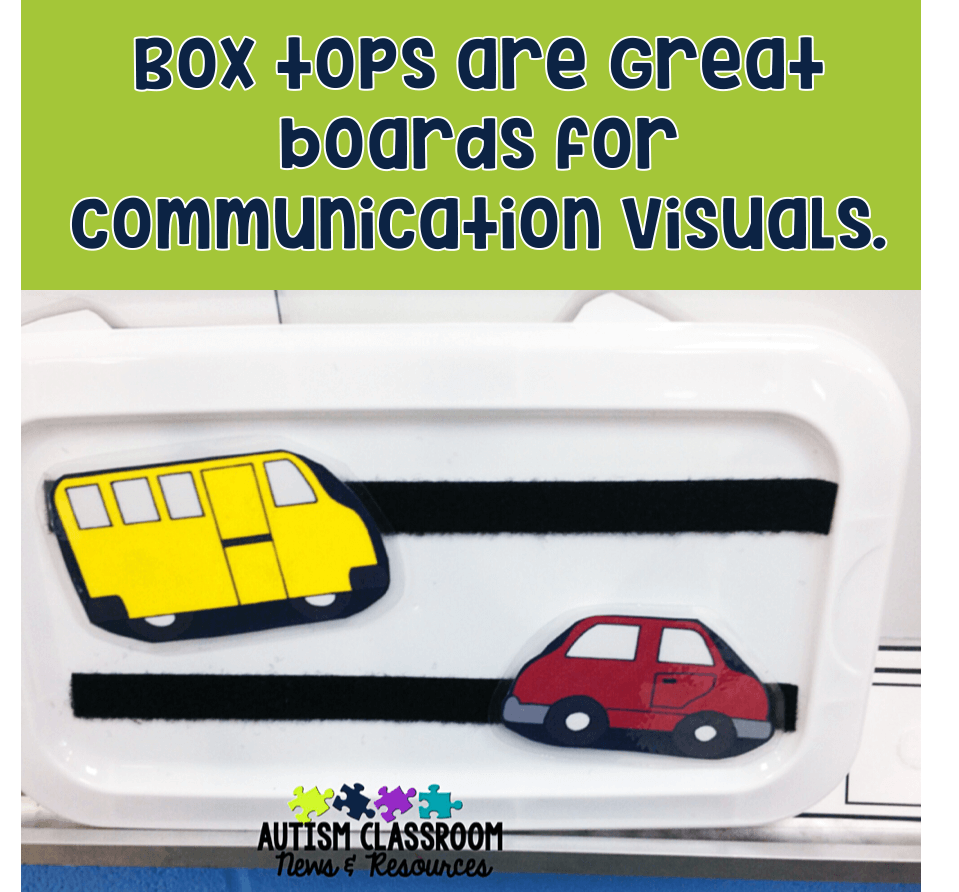 We have so many box tops lying around because we don’t need them for independent work. Why not put them to use? One way is to put Velcro on them and use them as communication boards. I’ve used them in morning meeting really effectively because they are sturdy and durable.
8. Cutting Boards for Visuals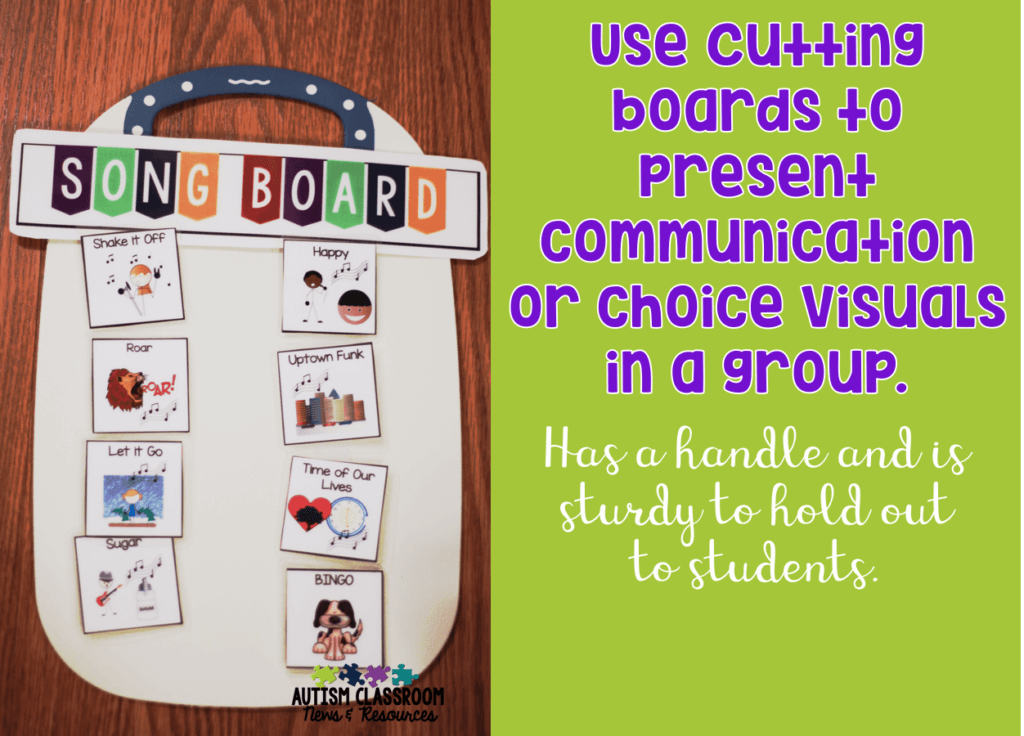
Cutting boards are another option to use for presenting visuals. I really like those to put choice and communication visuals during group activities. They have a handle and they are durable. And you can find them for $1 at the dollar store.
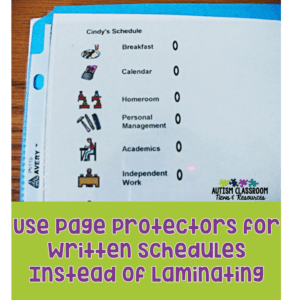
9. Use Page Protectors
Many of us know that you can use page protectors instead of laminate at times. But sometimes they are the best choice. If you have students using written schedules, put their schedule in a page protector instead of laminating it. Chances are good that schedules are going to change. It’s going to be a lot easier to do that if you can pull out the old copy from the page protector.
10. Use Menu Size Laminate Pouches for File Folders
I’ve had several people ask about how I laminate file folders with a personal laminator. So I made a little tutorial. You will need menu size laminate pouches like these. Just make sure your laminator is wide enough–it has to be able to take material 12 inches wide at least.
So, learn anything new? I’ll be back in the future with more tips. In the meantime, we are gearing up for Autism Acceptance and Awareness Month. We have lots of fun things planned, so stay tuned!
Until next time,