
Continuing on with the discussion of discrete trial training (DTT), I’m going to dissect the 6 parts of a discrete trial that I talked about in the last post and hopefully give some food for thought about each step. Then I’m going to come back to how we decide when and how to use DTT as a strategy and deciding what to teach and how to present it.
One of the most important elements of DTT is making sure that you have the learner’s attention BEFORE you administer the trial. For simple trials, that means making sure that the student is listening to your direction. In order to do that, we usually start working with a student by teaching them to attend to the teacher. Most, if not all, curricula for DTT start with this skill along with following one-step directions and other basic learning skills. We often refer to these skills as learning readiness skills because they are skills that a learner needs in order to learn. If you aren’t attending to the direction, you won’t be able to follow it. Similarly, you have to be attending to the materials. So it’s more than just looking at the instructor–it’s knowing when to look at the instructor (e.g., for a verbal direction) and when to look at the materials. There are more complex types of observation as well like knowing what parts of the materials to base the answer on and which are the important ones in helping make a differentiation between materials (e.g., between a pear and a cow). I’ll get to those later in the series. For today I want to focus on how we get that initial attention. Here are 5 things to assure you have the student’s attention.
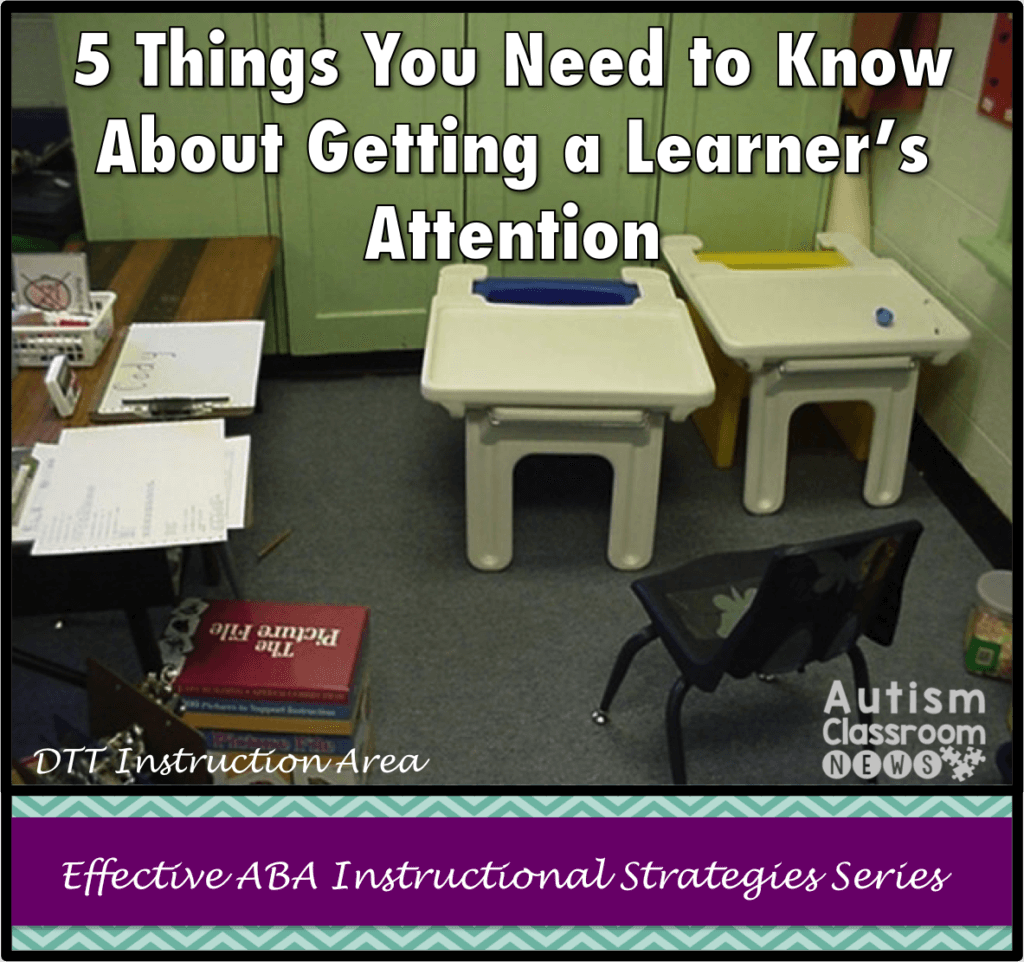
1. Set up the area
So many things in instruction come down to environmental arrangement to facilitate your efforts. In this case, setting up a discrete trial or instructional area that limits distractions and with all your materials readily available can help the student to focus just on you. In the picture at the top of the post, the students sit with their back to the walls to limit need of the instructor to keep them in the area. The cube chairs (Educubes) with the trays give the student cues about where to stay. If they stand up, the tray falls down, so it doesn’t keep them in the chair. But it does give physical cues about staying in their seat and gives a work surface that is easy for the teacher to reach across to prompt. And finally, the students are facing a wall that is behind the teacher so they aren’t looking out at the rest of the class, which limits distractions. This helps make the instructor the center of attention. You can also use a teacher table or other area of the room, but make sure that wherever you choose, there are limited distractions and you and the materials are the center of attention.
2. Pair yourself with reinforcement
I’ve talked about reinforcement HERE, HERE, and HERE and I know I’ll talk about it more in this series. However, it’s a critical part of all good teaching. Pairing yourself with something that the student likes is a great way to make YOU reinforcing. When you are reinforcing, the student will look to you for reinforcement. Start sessions and your instruction in general just playing with reinforcers. This serves multiple purposes. It pairs you with the reinforcers so you become reinforcing. It helps you determine items or activities that might serve as reinforcers for this session. And it serves as a sample of what is to come and makes the reinforcer more reinforcing. Just play and let the student have some of the reinforcer (e.g., a goldfish cracker, a few blows of bubbles) and it works like a grocery store sample. You weren’t thinking of buying chocolate covered strawberries when you walked in the store….but after you try one….well, we know how that ends.
3. Teach it
Teach a student to attend to you on cue as one of the first sets of trials. This is a key learning readiness skill. Teach the student to look in your direction when you call his or her name. We do this as a set of drills and I would just build it into your play or interaction with the reinforcers. Hold on to the reinforcer and call the student’s name or say “Listen.” When the student acknowledges you in some way, give back the reinforcer. This also works toward teaching him that when you take the reinforcer, he will get it back and makes it easier to use the reinforcer and take it back for the next trial (more about that later). Generally, I don’t require eye contact, but I do work for some indication that they look in your direction. I’ll be back with my next post to talk about why I don’t typically teach “look at me” and require eye contact and what I do instead.
4. Highlight the material
Once the learner is attending to you and you have been effectively paired with a reinforcer, it’s time for the student to learn to attend to materials in addition to your directions. For instance, if Connor needs to identify an apple out of a set of apple, house, and sweater, he has to know to look at the material in order to do it–looking at the teacher won’t do it–or shouldn’t if we are doing it right. Similarly, if Connor needs to discriminate between dog and a fish, he has to be able to focus on specific elements in the pictures that might tell the difference (e.g., a dog has legs, a fish is swimming). In order to do that, we need to make sure that our materials make those differences clear and that the backgrounds don’t distract or that he doesn’t learn a fish is blue (we always used red fish, blue fish) and a dog is black (we always used a picture of a black lab puppy). This will come up again when we talk about materials.
5. Generalize it
Once you teach the student to attend in the training area, work on generalizing that attention to you throughout the room and then throughout the school. Carry a reinforcer in your pocket and pull it out periodically and call his name. Use the same language you used to catch his attention when you are walking down the hallway. Pair yourself with reinforcement everywhere so that you can call the student from across the room and he will look your way to check in. This makes the skill functional throughout the day.
So as I said, I’ll be back in the next post to talk about why I don’t teach “look at me” and I don’t require direct eye contact. Then we’ll move on to the other steps in the DTT process.
Have tips for teaching students to attend to you and/or materials? Please share them in the comments!
Until next time,